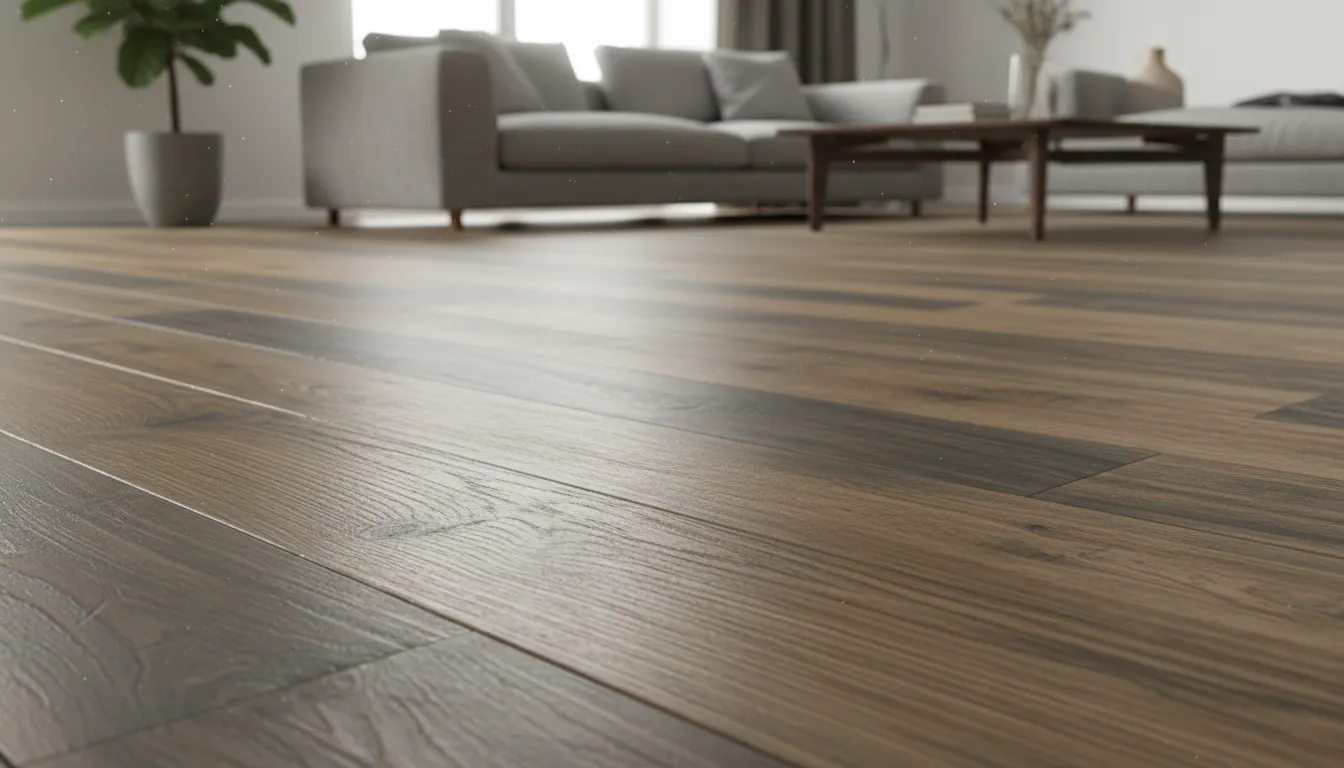
PVC flooring is a practical and versatile solution, ideal for anyone who wants to renovate their home without dealing with complex work. One of its main advantages is how easy it is to install: many options come with click-lock or adhesive systems that allow for quick installation, even without professional help. This means less time, less mess, and no need for invasive renovations.
Did You Know?
Luxury vinyl (LVP/LVT) typically lasts 15–20+ years, while standard vinyl often lasts 5–10 years—so a DIY-friendly floor can still be a long-term upgrade.
Source: 2026 PVC Flooring Market Analysis (lifespan ranges cited in provided research)
(Discover many other contents on: NOWO.ONEand NOWO Publishing)
Another strong point is the wide range of colors and finishes available. You can choose from wood, stone, or concrete effects, as well as modern and minimalist tones, perfect for matching any interior style. Thanks to this variety, it’s easy to completely transform the look of a room, making it more elegant and contemporary.
In addition, PVC flooring is a cost-effective choice: it allows you to achieve a high-impact aesthetic result with a limited budget. It’s the perfect solution for adding a modern touch to your home without spending too much or dealing with long renovation projects.
Cost breakdown and PVC types (LVP, LVT, sheet vinyl)
If I’m budgeting PVC flooring, I start by separating two numbers: the flooring itself and the install. Installed PVC flooring commonly lands around $2–$15 per square foot (about $21.50–$161 per square meter), but the type you choose—and how it’s installed—changes the total fast.
Labor is the biggest “swing” cost. Installation often adds $1–$10 per sq ft (roughly $10.75–$107.50/m²) depending on whether it’s a simple floating click-lock job or a glue-down install with serious subfloor prep.
Quick chooser: pick the right PVC floor by budget + room
Sheet vinyl (best for the lowest upfront cost)
Typically $1–$2/sq ft ($10.75–$21.50/m²) for materials; great for rentals, laundry rooms, and quick refreshes, but expect a shorter 5–10 year lifespan.
VCT / vinyl composite tile (budget commercial workhorse)
Usually $1–$4/sq ft ($10.75–$43/m²) for materials; durable in utility areas and can be waxed/buffed, but seams and maintenance matter.
LVP (wood-look value upgrade)
Commonly $4–$10/sq ft ($43–$107.50/m²); thicker wear layers and click-lock options make it a strong DIY pick with 15–20+ year potential.
LVT (tile-look flexibility, widest price spread)
About $3–$15/sq ft ($32.25–$161/m²); ideal for stone/concrete looks in kitchens and baths—higher-end lines cost more but last longer.
Labor is the swing factor
Install typically adds $1–$10/sq ft ($10.75–$107.50/m²) depending on glue-down vs floating, subfloor prep, and room complexity.
What you’re really paying for: material layers + install method
Standard sheet vinyl is the price leader because it’s thin, fast to cover large areas, and often sold by the roll. The trade-off is lifespan: standard vinyl is usually a 5–10 year play, so it’s perfect when I want a clean look in a low-stakes space or I’m renovating to rent.
VCT (vinyl composite tile) sits in the budget zone too, typically $1–$4/sq ft ($10.75–$43/m²). It’s common in basements, storage areas, and utility rooms because it can handle traffic, but it can also mean more seams and ongoing maintenance (think waxing/buffing) if you want it looking sharp.
LVP (luxury vinyl plank) and LVT (luxury vinyl tile) cost more because they’re built thicker and tougher. That extra structure usually buys you 15–20+ years, plus better dent resistance and nicer visuals. If I’m comparing value-for-money, luxury vinyl is often cheaper over time—even if the receipt is higher on day one.
How labor changes the total (and why DIY can matter)
Labor runs roughly $1–$10 per sq ft, and the jump is usually about prep and precision. A click-lock floating floor can be faster (and more DIY-friendly) because it doesn’t require full-spread adhesive, while glue-down installs take longer and punish an uneven subfloor.
If I’m hiring out, I also budget for extras that quietly raise the line item: subfloor leveling compound, moisture barrier/underlayment, removing old flooring, and transitions/trim cuts around doorways and cabinets.
Which PVC type I’d choose by budget, room use, and lifespan
For the tightest budget: sheet vinyl in a guest bath, laundry, or a quick kitchen refresh. For a workhorse utility space: VCT where durability matters more than a seamless “designer” look. For the best blend of price and long-term durability: LVP in living areas, bedrooms, and hallways—especially when I want a wood-look with easy replacement of a single plank later.
When the goal is tile or stone visuals without cold grout lines, I lean LVT. Higher-end LVT costs more up front, but in wet-prone rooms like bathrooms or basements, paying for a tougher wear layer and stable construction can save me from early replacement.
PVC flooring is a practical and versatile solution, ideal for anyone who wants to renovate their home without dealing with complex work. One of its main advantages is how easy it is to install: many options come with click-lock or adhesive systems that allow for quick installation, even without professional help. This means less time, less mess, and no need for invasive renovations.
Another strong point is the wide range of colors and finishes available. You can choose from wood, stone, or concrete effects, as well as modern and minimalist tones, perfect for matching any interior style. Thanks to this variety, it’s easy to completely transform the look of a room, making it more elegant and contemporary.
In addition, PVC flooring is a cost-effective choice: it allows you to achieve a high-impact aesthetic result with a limited budget. It’s the perfect solution for adding a modern touch to your home without spending too much or dealing with long renovation projects.
Installation methods: click-lock vs adhesive
When I’m choosing PVC flooring, the installation method matters as much as the wear layer. Click-lock (floating) and adhesive (glue-down) can both look identical once finished, but they behave differently under moisture, traffic, and subfloor movement.
Choose your install: Click-lock vs Adhesive
Two reliable ways to install PVC flooring—pick based on moisture, traffic, and how permanent you want the floor to be.
- ✓ Click-lock (floating): fastest DIY-friendly, great for most dry rooms and weekend installs
- ✓ Adhesive (glue-down): most secure under heavy rolling loads and frequent wet mopping, best for high-traffic/commercial-style use
- ✓ Subfloor matters: flatness is critical for click-lock; adhesive tolerates transitions better but needs thorough prep
- ✓ Budget signal: adhesive usually costs more in labor due to troweling, open time, and cleanup
Click-lock (floating) PVC: fast, forgiving, and DIY-friendly
Click-lock LVP/LVT uses interlocking edges so the floor “floats” over the subfloor without glue. I like it for bedrooms, living rooms, rentals, and any space where I might want to replace a damaged plank later without scraping adhesive.
DIY is realistic with a few specific tools: a Roberts laminate/vinyl pull bar, tapping block, spacers, a utility knife (for thinner LVP) or a guillotine-style vinyl cutter like the Bullet Tools EZ Shear. You still need clean cuts around jambs, so an oscillating multi-tool (like a DEWALT DCS356) helps.
Time estimate: a single room often goes down in a day once the subfloor is ready. The biggest performance factor is flatness—click systems hate humps and dips because they stress the locking joints and can create a “bounce.”
Adhesive (glue-down) PVC: stable under traffic and moisture routines
Glue-down PVC is bonded directly to the substrate with pressure-sensitive or wet-set adhesive. It’s common in busy hallways, kitchens, basements, and commercial-style spaces where rolling loads (office chairs, carts) and frequent damp mopping can make floating floors shift or chatter.
Adhesive installs demand better prep and more discipline. I plan for scraping, patching, and sanding, then apply adhesive with the correct notched trowel, watch the open time, lay material into the tack, and finish with a 100-lb floor roller (Roberts 10-952 is a popular style). If moisture is a concern, the right primer or moisture-mitigation system matters as much as the glue.
Cost and labor: why glue-down usually runs higher
PVC flooring commonly lands around $2–$15 per square foot installed, and labor can add about $1–$10 per square foot depending on method and prep. In my experience, click-lock tends to be on the lower end of labor because it’s faster and cleaner, while glue-down pricing climbs with patching, adhesive steps, and rolling.
How I pick the right method for the room and subfloor
Subfloor flatness: if I can’t get the floor very flat, glue-down can be more forgiving than a click joint—after proper patching.
Moisture routine: for spaces that see wet shoes, mopping, or basement humidity, glue-down often feels more “locked in,” even though PVC itself is waterproof.
Traffic and loads: chairs, wheelchairs, or heavy furniture nudging around favors glue-down stability.
Future flexibility: if I want easier repairs or a simpler replacement later, click-lock wins.
Durability, waterproofing and maintenance
PVC flooring earns its “practical” reputation when daily life gets messy. The big durability split is between standard vinyl sheet (typically 5–10 years) and luxury formats like LVP (luxury vinyl plank) and LVT (luxury vinyl tile), which commonly run 15–20+ years thanks to thicker construction and more robust core layers.
That lifespan range isn’t magic; it’s wear. In a low-traffic guest room, even budget sheet vinyl can look fine for years. In a busy kitchen with rolling chairs, grit, and constant cleaning, a better LVP/LVT build usually pays back because the surface resists scratching and dulling longer.
PVC flooring is also known for being 100% waterproof and stain-proof, which is why I’d confidently put it in kitchens, bathrooms, and basements. Standing water still shouldn’t be a lifestyle choice, but spills, wet boots, and splashes are rarely a crisis the way they can be with hardwood or some laminates.
Choose the right wear layer (before you buy)
For busy kitchens, kids, or pets, pick LVP/LVT with a thicker wear layer and reinforced core—this is the biggest driver of real-world durability beyond the pattern/finish.
Stop grit at the door
Use a heavy-duty entry mat and felt pads under chairs. Grit acts like sandpaper on vinyl, dulling the finish faster than normal foot traffic.
Daily cleanup: dry first, damp second
Sweep or vacuum with a hard-floor setting, then damp-mop with a pH-neutral vinyl cleaner. Avoid steam mops and abrasive powders.
Handle spills and stains immediately
Blot oils, wine, and sauces quickly; rinse with clean water and dry. For scuffs, try a white nylon pad or a small amount of isopropyl alcohol on a cloth.
Periodic protection check
Every few months, inspect seams/edges, refresh chair pads, and re-seal transitions/trim if needed—especially in bathrooms and basements.
Warranty reality check
Warranties can be long, but they’re specific. Read the care rules (many exclude steam mops), confirm whether it’s “residential” vs “commercial,” and note what counts as a failure versus normal wear. Also check subfloor requirements and moisture limits, since click-lock floating floors and glue-down installs can have different coverage triggers.
My realistic expectation: standard vinyl is a solid short-to-mid-term solution, while LVP/LVT is where you buy time—especially if you treat grit control and gentle cleaning like part of the installation.
Design options: finishes, colors and room makeovers
PVC flooring is basically a style chameleon: I can get wood-look LVP, stone-look LVT, or a concrete look without committing to the upkeep those materials usually demand. For a calm, modern/minimalist vibe, I lean toward light oak or greige planks with matte wear layers; for a sharper contemporary look, charcoal concrete visuals and cleaner grout-line patterns do the heavy lifting.
Texture and tone change how a room “reads.” Embossed-in-register wood grain makes planks feel more authentic underfoot, while a smooth stone visual feels sleeker and more formal. Light, low-contrast patterns open up small spaces; darker, higher-contrast floors visually “ground” big rooms. Gloss can bounce light in a dim hallway, but matte is my go-to for hiding everyday scuffs and dust.
Pick a hero finish
Match the vibe: wood-look LVP for warm, lived-in rooms; stone-look LVT for crisp, upscale lines; concrete-look vinyl for modern/industrial.
Choose sheen & texture
Matte hides dust and scratches; gloss bounces light (great for small, dim rooms). Add embossed-in-register texture to sell the “real” grain.
Set a palette
Minimalist: greige/oak + white walls + black hardware. Bold: charcoal concrete + brass + warm wood accents. Keep trims consistent room-to-room.
Scale the pattern
Wide planks elongate a space; smaller tiles feel classic. Run planks lengthwise to visually stretch narrow hallways and galley kitchens.
Room-by-room tweak
Kitchen/bath/basement: waterproof click-lock LVP/LVT with sealed seams; living room: cushioned underlayment for comfort and sound control.
Finish with low-cost swaps
New baseboards, a washable rug, and 2700–3000K lighting make the new floor read intentional—without a full remodel.
Room picks I’ve seen work: living rooms love wide-plank wood looks; kitchens handle stone looks well (they hide crumbs); bathrooms look fresh with light marble visuals; basements benefit from concrete styles that make the space feel intentional, not “leftover.” For a cheap before-and-after, I swap to black lever handles (Schlage Latitude) and repaint trim (Benjamin Moore Chantilly Lace) to make the new floor feel like a full makeover.
DIY tips and budgeting strategies
Measure each room (length × width), subtract permanent cabinets, then add 5–10% extra for cuts. For a smooth install, the subfloor should be clean and flat: scrape residue, vacuum, patch low spots with Henry 547 Universal Patch, and knock down ridges with an orbital sander.
Essential tools: 25 ft tape, 6 ft straightedge, utility knife + hook blades, tapping block, pull bar, spacers, and a jigsaw for notches. Plan 3–5 hours for a 150 sq ft click-lock LVP room (plus prep); adhesive installs take longer and get messier.
Split the work: where DIY wins vs where pros pay for themselves
DIY tasks (save labor cost)
Handle the prep and easy install steps yourself to cut the $1–$10/sq ft labor portion.
- • Measure: length × width per room, add 5–10% waste for cuts and pattern matching
- • Prep: scrape old adhesive, fill dips with Henry 547 Universal Patch, and sand high spots
- • Install click-lock LVP (e.g., SMARTCORE Ultra) as a floating floor with 1/4 in expansion gap
Hire out the tricky parts (avoid rework)
Pay for precision where mistakes are expensive, then finish the rest DIY.
- • Subfloor flattening/leveling with self-leveler (Ardex K 22 F) if you have wide dips or waves
- • Moisture testing/mitigation on concrete slabs, especially basements
- • Complex cuts: toilets, stair noses, and doorway transitions using Schluter RENO profiles
Common pitfalls: skipping acclimation, tight cuts without expansion gaps, and installing over soft underlayment. Quick low-mess checklist: empty room, protect vents, stage planks, keep a shop-vac nearby, and save unopened boxes for returns.
Frequently Asked Questions
PVC flooring (including LVP/LVT and sheet vinyl) gets a lot of love because it’s tough, budget-flexible, and easy to live with. These are the questions I get most often when someone is deciding between standard vinyl and luxury vinyl, or planning an install in a wet space.
Is PVC (vinyl) flooring really waterproof? ▼
Can PVC flooring be installed over existing floors? ▼
How long does LVP/LVT last compared to standard vinyl sheet? ▼
Do I need a professional installer or can I DIY? ▼
How much does PVC flooring cost per square meter, and what changes the price? ▼
Is PVC flooring suitable for bathrooms and basements? ▼
How do I maintain and clean PVC flooring to maximize lifespan? ▼
If you’re stuck between click-lock LVP and glue-down vinyl, I focus on two things: how flat the subfloor is and how wet the room gets. Those two details usually decide whether the floor will look great for 5 years or still feel solid at year 15.
Conclusion
PVC flooring is a practical and versatile solution, ideal for anyone who wants to renovate their home without dealing with complex work. One of its main advantages is how easy it is to install: many options come with click-lock or adhesive systems that allow for quick installation, even without professional help. This means less time, less mess, and no need for invasive renovations.
Another strong point is the wide range of colors and finishes available. You can choose from wood, stone, or concrete effects, as well as modern and minimalist tones, perfect for matching any interior style. Thanks to this variety, it’s easy to completely transform the look of a room, making it more elegant and contemporary.
🎯 Key takeaways
- → PVC flooring stays budget-friendly: roughly $21–$161/m² installed depending on sheet, VCT, LVP, or LVT—and you can scale quality to your room.
- → DIY-friendly options like click-lock LVP/LVT speed up low-mess renovations, while adhesive installs trade more work for a more permanent bond in demanding spaces.
- → Choose your look (wood/stone/concrete), confirm 100% waterproof performance for kitchens/baths/basements, then set a realistic budget and timeline before you buy.
In addition, PVC flooring is a cost-effective choice: it allows you to achieve a high-impact aesthetic result with a limited budget. It’s the perfect solution for adding a modern touch to your home without spending too much or dealing with long renovation projects.
TL;DR: PVC flooring is a practical, budget-friendly way to update a home with easy DIY-friendly installation (click-lock or adhesive), wide style options (wood, stone, concrete), and varying lifespans—luxury vinyl often lasts 15–20+ years while standard sheet vinyl lasts about 5–10 years. Material costs range roughly $1–$15 per ft² depending on type (sheet vinyl, VCT, LVP, LVT) and installation typically adds $1–$10 per ft², making labor the biggest variable in total project cost.
Comments
Post a Comment